Today I ran a revised version of the pressure sensor lab (see
Pressure-sensor lab went well, Class-D lab revision didn’t work, Blood pressure monitor, Blood pressure lab, and Blood pressure lab part 2 for descriptions of the old labs).
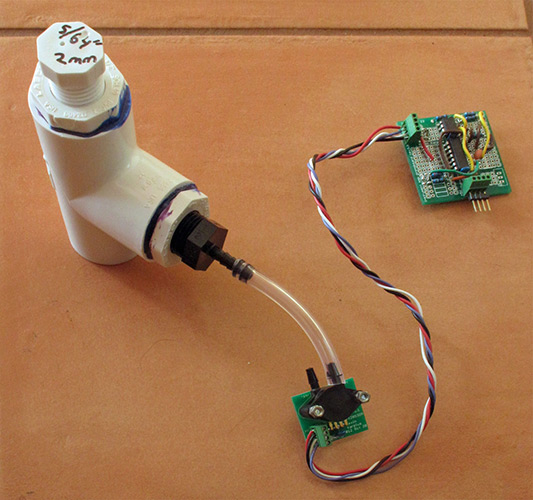
The revised lab included both blood pressure cuffs and breath pressure using the simplified breath pressure apparatus of Simplified breath pressure apparatus:
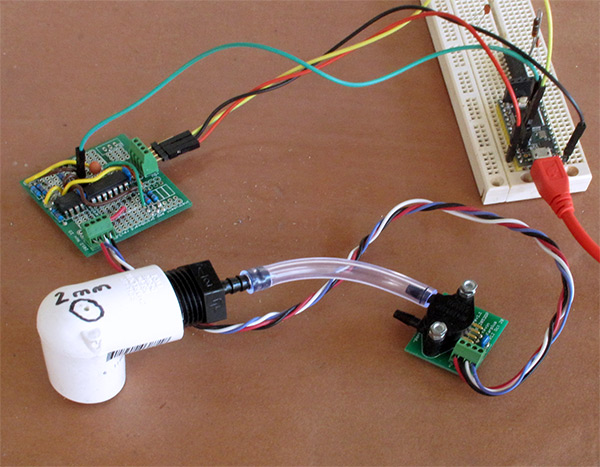
The ½” elbow is small enough that I can put my lips around the opening, which would have been a bit difficult with the 1″ tee.
To make the apparatus, the students had to drill 2mm holes in PVC elbows, so I packed up my drill press last night and hauled up the hill in my bike trailer this morning. For those unfamiliar with Santa Cruz, that is a 3-mile ride with a fairly steady 4% slope, resulting in a climb of about 715′ (218m). Needless to say, I went slower than usual uphill! There is a drill press only about 150′ from the lab the students were working in, but the bureaucracy for getting the students access to the drill press is incredible (I tried, and failed, to get a dozen students access last quarter). So it was easier for me to haul my own drill press up the hill on my bike than to deal with the dysfunctional bureaucracy at UCSC to use the drill press supposedly there for student use.
I explained to each pair of students how to use a drill press, including basic safety precautions, and had them drill a 2mm diameter hole in their PVC elbows. There were no problems with this, and I plan to do the same for the lab in future.
Each pair of students designed an instrumentation amplifier with an INA126P chip as a first stage and an op-amp as a second stage, wired it up on breadboards, checked the calibration, and recorded both breath pressure and blood cuff pressure. A few students used extra time to play around with some toys I brought in: a hand vacuum pump, a Lego pneumatics pump, and an aquarium air pump. One group even tried using the pressure sensor as a microphone, using a loudspeaker with a 300Hz sine wave for input (the pressure sensor could detect the 300Hz input without problems, though I suspect that it was not registering the full pressure fluctuation, as I think that the sensor has about a 200Hz bandwidth).
Most groups were done with this week’s lab in the 3 hours of today’s lab, so Thursday’s lab will consist mostly of students doing make-up work to redo old labs, with a few finishing up this week’s lab. I expect to spend most of Thursday’s lab time grading design reports (I’m about 2 days behind—I got the design reports that were turned in a week ago done and returned yesterday, and I got the prelabs turned in yesterday done and returned today, but I haven’t started yet on the reports turned in last Friday, nor the stack of redone work turned in last week).
The instrumentation-amp lab went surprisingly well this year, despite adding the drill press. I think that the big advantages over previous years are that they did not have to solder the inst amps this year and that they had already done a multi-stage amplifier for the microphone amp.
I think that I should rewrite the book to introduce multi-stage amplifiers as the default design (since every amplifier they do in the course is now multi-stage), and talk about how to choose the gain for each stage in general, before getting into individual labs.
One minor problem in lab today—students didn’t have the short pieces of tubing to connect up their breath-pressure apparatus. This turned out to be my fault—I hadn’t included them on the parts list for this year! Luckily the BELS staff had some pieces leftover from last year, and I had about 20 feet of my own tubing in the box of stuff I’d packed for the lab, so we had enough for everyone to get 6″.


")
 or hardback ($198)")

