Gas station without pumps

2014 March 5

Sixteenth day: Arduino demo

Filed under: freshman design seminar,Pressure gauge — gasstationwithoutpumps @ 20:57
Tags: , , , , , ,

Today’s class in the freshman design seminar went well. I started by returning the drafts of the design reports and giving some generic feedback. I realized on reading the reports that I had not given a good explanation of what I meant by describing the components of the system—two of the groups had given me long parts lists on the first page of their reports, something that would only really be appropriate in an appendix. I explained that what I wanted was what the main blocks in the block diagram were, and that they should use the block diagram to organize their report, writing a page for each block. I also suggested that they use the block diagram to partition the project among the group members, with each group member working on a different component, then getting back together to reconcile any discrepancies. Note that this is much more like real engineering group work than the usual K–12 group project, which is usually done most efficiently by turning the whole project over to the most competent member of the group.

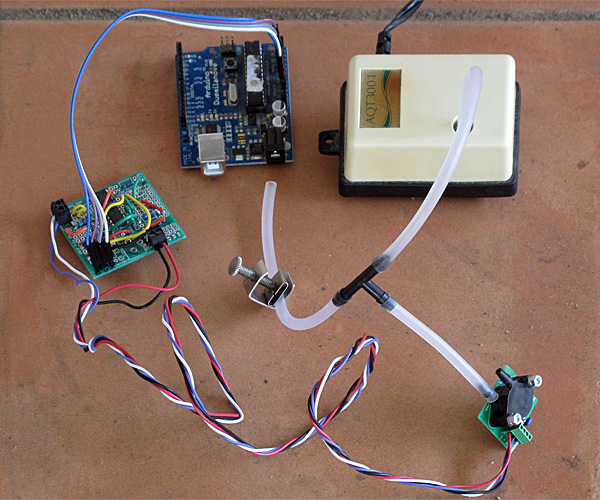
After the feedback on design reports, I offered the students a chance to get a demo of building an Arduino program with sensing and motor control. This was a completely extemporaneous demo—I had gathered a number of possibly useful components, but had not tested anything ahead of time nor even figured out what order to do the demo in.  I asked the students if they wanted me to start with sensing or control—they asked for the motor control first.

I started by pulling a motor out of box of motors I had gotten when the elementary school my wife works at cleaned out their closets.  I told the students that I had no idea what the spec of the motor were, but since it came from an elementary school, it probably ran on 3v batteries.  I tested the motor by hooking it up first to the 3.3v, then to the 5v power on my Arduino Uno.  It spun just fine on 3.3v, but squealed a bit on 5v, so we decided to run it on 3.3v.

I then pulled out the Sainsmart 4-relay board that I had bought some time ago but never used.  I explained how a relay worked, what single-pole double-throw meant, and normally open (NO) and normally closed (NC) contacts. I used the board unpowered with the NC contacts to spin the motor, then moved the wire over to the NO contacts to turn the motor off.  I then hooked up power to the board and tried connecting input IN1 to power to activate the relay.  Nothing happened. I then tried connecting IN1 to ground, and the relay clicked and the motor spun.  The inputs to the Sainsmart board are active low, which I explained to the students (though I did not use the terminology “active low”—perhaps I should have).  I did make a point of establishing that the relay provides very good isolation between the control logic and the circuitry being controlled—you can hook up AC power from the walls to the relay contacts without interfering with the logic circuitry.

Having established that the relay worked, the next step was to get the class (as a group) to write an Arduino program to control the motor using the relay. With me taking notes on the whiteboard, they quickly came up with the pinMode command for the setup, the digitalWrite and delay for the loop, and with only a tiny bit of prompting with a second digitalWrite and delay to turn the motor back off.  They even realized the need to have different delays for the on and off, so we could tell whether we had the polarity right on the control.  Here is the program we came up with:

#define RELAY_PIN (3)

void setup()
{   pinMode(RELAY_PIN, OUTPUT);
}

void loop()
{
  digitalWrite(RELAY_PIN,LOW); // turn motor ON via relay (or off via transistor)
  delay(1000);  // on for 1 second
  digitalWrite(RELAY_PIN,HIGH); // turn motor OFF via relay (or on via transistor)
  delay(3000); // off for 3 seconds
}

I typed the code in and downloaded it to the Arduino Uno, and it worked as expected.  (It would be nice if the Arduino IDE would allow me to increase the font size, like almost every other program I use, so that students could have read the projection of what I was typing better.)

I then offered the students a choice of going on to sensing or looking at pulse-width modulation for proportional control.  They wanted PWM. I explained why PWM is not really doable with relays (the relays are too slow, and chattering them would wear them out after a while.  I did not have the specs on the relay handy, but I just looked up the specs for the SRD-05VDC-SL-C relays on the board: They have a mechanical life of 10,000,000 cycles, but an electrical life of only 100,000 cycles.  The relay takes about 7msec to make a contact and about 3msec to break a contact, so they can’t be operated much faster than about 60 times a second, which could wear them out in as little as half an hour.

So instead of a relay, I suggested an nFET (Field-Effect Transistor). I gave them a circuit with one side of the motor connected to 3.3V, the other to the drain of an nFET, with the source connected to ground.  I explained that the voltage between the gate and the source (VGS) controlled whether the transistor was on or off, and that putting 5v on the gate would turn it on fairly well. I then got out an AOI518 nFET and stuck it in my breadboard, explaining the orientation to allow using the other holes to connect to the source, gate, and drain.

I mentioned that different FETs have the order of the pins different, so one has to look up the pinout on data sheet. I pulled up the AOI518 data sheet, which has on the first page “RDS(ON) (at VGS = 4.5V) < 11.9mΩ”. I explained that if we were putting a whole amp through the FET (we’re not doing anywhere near that much current), the voltage drop would be 11.9mV, so the power dissipated in the transistor would be only 11.9mW, not enough to get it warm. I mentioned that more current would result in more power being dissipated (I2R), and that the FETs could get quite warm. I passed around my other breadboard which has six melted holes from FETs getting quite hot when I was trying to debug the class-D amplifier design. The students were surprised that the FETs still worked after getting that hot (I must admit that I was also).

I hooked up the AOI518 nFET using double-headed male header pins and female jumper cables, and the motor alternated on for 3 seconds, off for one second. We now had the transistor controlling the motor, so it was time to switch to PWM. I went to the Arduino reference page and looked around for PWM, finding it on analogWrite(). I clicked that link and we looked at the page, seeing that analog Write was like digitalWrite, except that we could put in a value from 0 to 255 that controlled what fraction of the time the pin was high.

I edited the code, changing the first digitalWrite() to analogWrite(nFET_GATE_PIN, 255), and commenting out the rest of the loop. We downloaded that, and it turned the motor on, as expected. I then tried writing 128, which still turned the motor on, but perhaps not as strongly (hard to tell with no load). Writing 50 resulted in the motor not starting. Writing 100 let the motor run if I started it by hand, but wouldn’t start the motor from a dead stop. I used this opportunity to point out that controlling the motor was not linear—1/5th didn’t run at 1/5th speed, but wouldn’t run the motor at all.

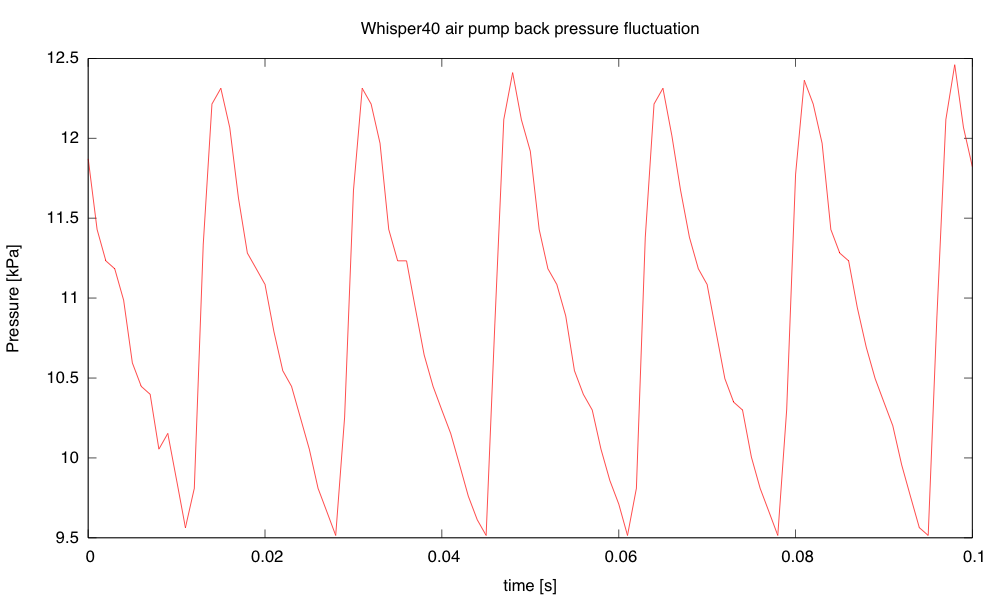
Next we switched over to doing sensors (with only 10 minutes left in the class). I got out the pressure sensor and instrumentation amp from the circuits course and hooked it up. The screwdriver I had packed in the box had too large a blade for the 0.1″ screw terminals, but luckily the tiny screwdriver on my Swiss Army knife (tucked away in the corkscrew) was small enough. After hooking up the pressure sensor to A0, I downloaded the Arduino Data Logger to the Uno, and started it from a terminal window. I set the triggering to every 100msec (which probably should be the default for the data logger), the input to A0, and convert to volts. I then demoed the pressure sensor by blowing into or sucking on the plastic tube hooked up to the sensor. With the low-gain output from the amplifier, the output swung about 0.5 v either way from the 2.5v center. Moving the A0 wire over to the high-gain output of the amplifier gave a more visible signal. I also turned off the “convert to volts” to show the students the values actually read by the Arduino (511 and 512, the middle of the range from 0 to 1023).

Because the class was over at that point, I offered to stay for another 10 minutes to show them how to use the pressure sensor to control the motor. One or two students had other classes to run to, but most stayed. I then wrote a program that would normally have the motor off, but would turn it full on if I got the pressure reading up to 512+255 and would turn it on partway (using PWM) between 512 and 512+255. I made several typos when entering the program (including messing up the braces and putting in an extraneous semicolon), but on the third compilation it downloaded successfully and controlled the motor as expected.

One student asked why the motor was off when I wasn’t blowing into the tube, so I explained about 512 being the pressure reading when nothing was happening (neither blowing into the tube nor sucking on it). I changed the zero point for the motor to a pressure reading of 300, so that the motor was normally most of the way on, but could be turned off by sucking on the tube. Here is the program we ended up with

#define nFET_GATE_PIN (3)

void setup()
{   pinMode(nFET_GATE_PIN, OUTPUT);
    pinMode(A0, INPUT);
}

void loop()
{ int pressure;
  pressure=analogRead(A0);
  if (pressure < 300)
  {    digitalWrite(nFET_GATE_PIN,LOW);  // turn motor off
  }
  else
  {   if (pressure>300+255)
      { digitalWrite(nFET_GATE_PIN,HIGH);  // turn motor on full
      }
      else
      {    analogWrite(nFET_GATE_PIN,pressure-300); // turn motor partway on
      }
  }
}

Note: this code is not an example of brilliant programming style. I can see several things that I would have done differently if I had had time to think about the code, but for this blog it is more useful to show the actual artifact that was developed in the demo, even if it makes me cringe a little.

Overall, I thought that the demo went well, despite being completely extemporaneous. Running over by 10 minutes might have been avoidable, but only by omitting something useful (like the feedback on the design reports). The demo itself lasted about 70 minutes, making the whole class run 80 minutes instead of 70. I think I compressed the demo about as much as was feasible for the level the students were at.

Based on how the students developed the first motor-control program quickly in class, I think that some of them are beginning to get some of the main ideas of programming: explicit instructions and sequential ordering. Because we were out of time by the point I got to using conditionals, I did not get a chance to probe their understanding there.

2013 July 2

Pressure sensor with air pump

I’ve been thinking of expanding the pressure sensor lab for the Applied Circuits Course to do something more than just measure breath pressure.  Perhaps something that conveys another physics or engineering concept.

One thing I thought of doing was measuring the back pressure and air flow on an aquarium air pump bubbling air into an aquarium. Looking at the tradeoff of flow-rate and back pressure would be a good characterization of an air pump (something I wish was clearly shown in advertisements for aquarium air pumps and air stones).  Measuring flow rate is a bit of a pain—about the best I could think of was to bubble air into an inverted soda bottle (or other known volume) and time it.

This would be a good physics experiment and might even make a decent middle-school product-science science fair project (using a cheap mechanical low-pressure gauge, rather than an electronic pressure sensor), but setting up tanks of water in an electronics lab is a logistic nightmare, and I don’t think I want to go there.

I can generate back pressure with just a simple clamp on the hose, though, and without a flow rate measurement we could do everything completely dry.

Setup for measuring the back pressure for an aquarium air pump (needs USB connection for data logger and power).

Setup for measuring the back pressure for an aquarium air pump (needs USB connection for data logger and power).

Using the Arduino data loggger my son wrote, I recorded the air pressure while adjusting the clamp (to get the y-axis scale correct, I had to use the estimated gain of the amplifier based on resistor sizes used in the amplifier).

The peak pressure, with the clamp sealing the hose shut, seems to be about 14.5 kPa (2.1psi).

The peak pressure, with the clamp sealing the hose shut, seems to be about 14.5 kPa (2.1psi).

I was interested in the fluctuation in the pressure, so I set the clamp to get about half the maximum back pressure, then recorded with the Arduino data logger set to its highest sampling frequency (1ms/sample).

The fluctuation in back pressure seems to have both a 60Hz and a 420Hz component.

The fluctuation in back pressure seems to have both a 60Hz and a 420Hz component with back pressure at about half maximum.

Because the Arduino data logger has trouble dealing with audio frequency signals, I decided to take another look at the signals using the Bitscope pocket analyzer.

The waveform for the pressure fluctuations from the AQT3001 air pump, with the backpressure about 7kPa (half the maximum).

The waveform for the pressure fluctuations from the AQT3001 air pump, with the back pressure about 7.5kPa (half the maximum).

One advantage of using the Bitscope is that it has FFT analysis:

Spectrum for the back pressure fluctuation.  One can see many of the multiples of 60Hz, with the particularly strong peak at 420Hz.

Spectrum for the back pressure fluctuation. One can see many of the multiples of 60Hz, with the particularly strong peak at 420Hz.

I was also interested in testing a Whisper40 air pump (a more powerful, but quieter, pump). When I clamped the hose shut for that air pump, the hi-gain output of the amplifier for the pressure sensor saturated, so I had to use the low gain output to determine the maximum pressure (24.8kPA, or about 3.6psi). The cheap Grafco clamp that I used is a bit hard to get complete shutoff with (I needed to adjust the position of the tubing and use pliers to turn the knob).  It is easy to get complete shutoff if the tube is folded over, but then modulation of less than complete shutoff is difficult.

The fluctuation in pressure shows a different waveform from the AQT3001:

The Whisper40 air pump, with the clamp set to get about half the maximum back pressure, produces a 60Hz sawtooth pressure waveform, without the strong 420Hz component seen from the AQT3001.

The Whisper40 air pump, with the clamp set to get a bit less than half the maximum back pressure, produces a 60Hz sawtooth pressure waveform, without the strong 420Hz component seen from the AQT3001. The peak-to-peak fluctuation in pressure seems to be largest around this back pressure. The 3kPa fluctuation is larger than for the AQT3001, but the pump seems quieter.

The main noise from the pump is not from the fluctuation in the pressure in the air hose, but radiation from the case of the pump. That noise seems to be least when the back pressure is about 1.1kPa (not at zero, surprisingly). The fluctuation is then all positive pressure, ranging from 0 to 2.2kPa and is nearly sinusoidal, with some 2nd and 3rd harmonic.

As the back pressure increases for the Whisper40, the 2nd, 3rd, and 4th harmonics get larger, but the 60Hz fundamental gets smaller. The 4th harmonic is maximized (with the 1st through 4th harmonics almost equal) at about 22.8kPa, above which all harmonics get smaller, until the air hose is completely pinched off and there is no pressure variation.

When driving the large airstone in our aquarium, the Whisper40 has a back pressure of about 7.50kPa (1.1psi) with a peak-to-peak fluctuation of about 2.6kPa.

I’m not sure whether this air-pump back-pressure experiment is worth adding to the pressure sensor lab.  If I decide to do it, we would need to get a dozen cheap air pumps.  The Tetra 77853 Whisper 40 air pump is $11.83 each from Amazon, but the smaller one for 10-gallon aquariums is only $6.88.  With 12 Ts and 12 clamps, this would cost about $108, which is not a significant cost for the lab.

2012 December 28

Parts packed, pressure sensors assembled, more thoughts on power amp

Filed under: Circuits course,Pressure gauge — gasstationwithoutpumps @ 22:54
Tags: , , , , ,

The DigiKey order arrived today, so I spent some time repacking all the parts into DIP tubes and little plastic bags.  I also assembled and soldered all 12 of the breakout boards for the MPX2053DP pressure sensors, but I’ve not tested the assembled boards yet.  I have an instrumentation amp set up for the boards, that I used when I was debugging the instrumentation amp lab and the breakout board with my own MPX2053DP pressure sensor, so I should be able to run through the dozen tomorrow fairly quickly (as long as there are no problems).

I was surprised by one thing in the DigiKey order, though I shouldn’t have been.  Because they were out of the original IR emitter I had chosen, I had quickly substituted the next cheapest one.  I had not noticed that it was a 5mm part instead of a 3mm part.  That doesn’t matter for this course (we’ll be sticking them in a breadboard anyway), and it might actually turn out to be an advantage, since the photodiode looks a lot like the IR emitter, but is a 3mm part.  It might have been difficult to keep them straight if both had been 3mm parts.

Incidentally, the alligator clips that I bought www.amazon.com/gp/product/B005HJXZ42/ turned out to have even worse quality control than I expected.  The box of 100 only had 98 alligator clips, and only 96 screws, so two of the clips ended up screwless. The plastic red and black sleeves are looser than on other alligator clips I’ve had, and the whole clip seemed a little flimsy.  I still think they were a reasonably good deal for the low price, but they are definitely low-end parts.

Yesterday I drilled and cut 12 electrode spacers for the stainless steel electrodes out of an old plastic cutting board, but I decided to buy 24″ bolt cutters to cut the 1/8″ stainless steel welding rod, rather than using the cutoff wheel on my wife’s Dremel motor tool.  The bolt cutters should arrive by the middle of next week, and I’ll finish making the stainless steel electrodes then.  I think that the only other lab equipment that is needed is a hotpot for boiling water (I’ll donate the old one from my office, if it still works), an ice bucket, some thermoses, and disposable coffee cups for the first lab.  The lab support staff have already put the secondary containment tubs in the lab.

I’ve also arranged for some stock NaCl solutions (1M,0.1M, and 0.01M) for the electrode lab, so I think the equipment situation is pretty good—I’ll have to convince my son to go in one more time to finish setting up the other 6 computers to run Python and the Arduinos correctly.  It’s looking like he’ll have the data logger code done this weekend, so we are tentatively planning to go in on Monday to install it. If our Leonardo Arduino board hasn’t arrived by then we may delay a day or two so that we can test the data logger customization with it—there are so many differences on the Leonardo board that something is almost bound to break in the code.  We should test on an Arduino Mega board as well, but I wasn’t willing to spend that much just for testing, as I don’t expect any of the students in the class to be bringing in a Mega board.

I also spent a fair amount of time this morning playing with the power amp design and learning to use the Bitscope USB oscilloscope better.  The function generator on the Bitscope Pocket Analyzer is not very good: it can produce adequate sine waves into a high-impedance resistive load, but it had trouble with triangle waves and with driving the input to the amplifier (which I thought was pretty high impedance).  I ended up switching back to my Elenco FG500 function generator, which seems to produce better waveforms, at least in this application.  I also noticed that the Bitscope picks up a lot of noise when measuring low-level signals (about 1mV of noise, even on a 10mV signal).  I compared the Bitscope display to the display on my Kikusui COS5060 for the same signal and found that most of the noise was not present in the source.  It was probably being generated either in the Bitscope leads or in the input stage of the Bitscope A to D.

I was able to drive the 8Ω speakers that the students will be using down to about 3 or 4Hz and up to about 240kHz (though, of course, I couldn’t hear anything above 15kHz).  I think that there may still be some crossover distortion in the amp, so I’m going to rewire it tomorrow with a trimpot in the middle of the bias network to see if I can eliminate the crossover problem without overheating the transistors.  The PTN7800W regulator I’m using to provide 6.6v doesn’t start limiting the current until 3.2A, so I could dissipate as much as 32W in the FETs if I’m not careful.  I started them smoking once (they recovered without signs of permanent damage), and I don’t want to do that again.  I’ll have to make sure that the lab writeup explains how to set the current limits on the bench power supplies and that the students limit their current to 0.5A until they are sure their design is working.

One thing I noticed today is that there was a quiet oscillation around 4.4KHz, probably due to the large delay in driving the capacitive load of the FET gates.  I added a compensating capacitor from the op amp output to the negative input, just by trial and error (0.1µF seems ok, though I suspect I could go smaller), since computing the correct compensation is rather messy.  I should probably read Intersil Application note AN9415.3 (or some similar App Note) to learn how to do the compensation correctly, but it is certainly beyond the scope of this course.  I’m now going to have to think very carefully about how the power amp design task is going to be formulated, so that it is doable by the students but not cookbook.

2012 November 23

Pressure sensor boards arrived

The breakout boards for the MPX2053DP pressure sensors arrived today.  They would have arrived two days ago, but I was at work and no one here heard the postman come—the packages have to be signed for, so I had to go down to the post office to day to get the package. I placed the order with ITEAD on 2012 Oct 29, they sent me e-mail saying they had shipped it on 2012 Nov 7, and it arrived 2012 Nov 23, for a total delay of 25 days.  I plan to order more sets of PC boards from them this weekend: another order of the pressure-sensor boards, a revised instrumentation amp prototyping board, and a hysteresis oscillator board.  If I order on 2012 Nov 24, I may get them by Dec 21, even without a special order.

MPX2053DP on the breakout board.

I assembled one MPX2053DP breakout board. It turns out that the leads are just barely long enough to reach the PC board, if you bend them at 90° right where they change size.  That is where I had planned the bend when I laid out the board, so I’m glad it worked.  The M3 machine screws do a fine job of holding the sensor in place, making soldering easy.  I’ll use metal M3 screws for the sensors I assemble for the lab, rather than nylon ones.

I’m using a different screw terminal than before.  This one has a 0.1″ pitch, which is convenient for matching up with dual-inline packages and is more compact than the 3.5mm pitch screw terminals I was using before (I got a bunch of 3.5mm and 5.0mm pitch screw terminals in the ITEAD order, very cheap, but I’ll probably not be using them for new designs, unless I need heavier wires than the 0.1″ screw terminals will take).  One minor problem with the new terminals is that you need a 1.5mm jeweler’s screwdriver—a 2.5mm screwdriver is too wide.  Luckily I have a smaller one, and the set I was planning to include in the student toolkit has not only 1.5mm, but several smaller ones.

I tested the pressure sensor with the amplifier I had wired up for the MPX2300DT-1 sensor, and noticed that it was very easy to peg the sensor at either extreme—I’ve got the gain set too high for this sensor.
Note that the MPX2053 has a response of 8E-08 Vdd/P, while the MPX2300 has a response of 3.75E-8 Vdd/P, where Vdd is the supply voltage to the sensor, and P is the pressure in Pascals.  So the MPX2053DP needs only half as much gain.  I also noticed that the INS126 instrumentation amplifier does not have rail-to-rail output.  I saw it going from 0.355 V to Vdd-0.7 V, though the spec only claims linearity from 0.8V to Vdd-0.75V typically.  I should probably turn the gain down by a factor of 10 in the instrumentation amp and use a second-stage op amp with a gain between 2 and 4 to get a rail-to-rail signal.  That will require unsoldering the gain resistor and wiring up a couple more resistors for the second-stage op amp.  I think I’ll do it in 2 steps: first adjusting the instrumentation amp gain by replacing Rgain and seeing what range of voltage I get from my breath pressure, then adding a second stage amplifier to bring that to full scale.

I think I’ll try a first-stage gain of 102.6 (instead of 1072), which should give me a response of 8.205E-6 Vdd/P, and a full scale reading of 121.88 kPa, or 119Pa/count.  With that resistor in place, I’m not pegging the output at either end, and I’m using a little over ¼ of the available range.   A second-stage gain of 2 should be safe, but 3 may occasionally hit the stop. Perhaps I should aim for 50Pa/count, which would need a gain of about 2.38.   The best way to do this with a non-inverting op amp using standard resistors would use (11.5+15.8)/11.5 for a gain of 2.3739 (about 0.004% lower than I want).  I wrote a little Python program which can find the best approximation to any ratio using standard 1% resistor values—I didn’t try them all by hand!  Unfortunately, I have the standard 10% series (though with 1% resistors), so I need to try something like (47+33)/33, for 2.4242, a 3.2% error.  My gain would then be 102.56*2.4242=248.63, for a full-scale reading of 50.275kPa, or 49.1Pa/count.  It would be reasonable to use 33kΩ and 47kΩ.

Using just the instrumentation amp (single stage), the lowest pressure I recorded was –19.2 kPa (–2.79psi) and the highest was 15.1kPa (2.19 psi).  Using a handheld vacuum pump, I found that the low-pressure stop was about -390mm Hg (-52kPa), but that is with a most-likely inaccurate cheap dial gauge.  The clipping when the vacuum pump goes beyond that is at -392 counts (-46.64kPa, if the specs and the gain computations are to be believed).

After I soldered in resistors and wires for the second stage, it bottoms out at -25.24kPa (-3.66psi), with zeros.  I looked at the first-stage output on one Arduino channel and the second stage output on another, and fit a straight line to the untruncated part using gnuplot.  If we fit  stage2=g*(stage1-m)+m, we get a gain g=2.4351 and a midpoint offset m=511.677.   The total gain is thus about 249.74, for a full-scale reading of 50.05 kPa, or 48.88 Pa/count. The midpoint is not exactly at ambient pressure: it is about 300Pa below ambient pressure.  The spec calls for an offset that is <2.5% of the full-scale reading, and what I’m seeing is less than 1%, so I suspect that the offset is in the sensor, not in my circuitry. Doing another run blowing into the tube and sucking on it, the highest pressure I could manage was about 17.3kPa (2.51psi).  The lowest pressure I could get by mouth was about -16.6kPa (-2.41psi).

It would probably be a good idea to calibrate the sensor with a water column, but I still need to think that through a bit more—I don’t want a flood.

Other items in the package

In the same delivery from ITEAD, I got an assortment of 25 different capacitor values (10 of each).  These turn out to all have a 0.1″ (or 2.5mm) lead spacing, so I need to redesign the hysteresis oscillator board for that spacing (rather than the 0.2″ spacing I had used in the design). I had thought that there was about equal chances of 0.1″ or 0.2″ spacing, so I was not going to send out the new PC boards until I’d gotten the capacitors and checked.  The assortment comes nicely sorted in 25 tiny zipper-seal bags, but the bags aren’t labeled, so the first thing I did was to get out a Sharpie and a magnifying glass so that I could read the labels on the capacitors and label the bags.  I can’t order the capacitors for the students until Dec 14 (as students may still be registering for the course), so they will probably need to be ordered with express shipping.

Also in the same delivery was an assortment of 11 different bipolar transistors, 10 of each.  If we were doing anything in the class with bipolars, the price is pretty good (6.2¢ each), but now that I’ve decided we’ll use FETs for the power amplifier output, there won’t be any need for bipolar transistors.  I’ve not found a comparably cheap collection of FETs.

2012 October 27

New PC board design for pressure sensor

I designed a new breakout board for a pressure sensor today, for the MPX2053DP sensor. It took me a while to get the unibody outline drawn in an Eagle library so that I could place the part.

I could get 10 copies of the board from ITEAD for the same price as the instrumentation amp prototyping boards ($9.90 for 10, plus shipping), since they are 1.25″×1.1″, or 3.175cm×2.794cm, which is under the 5cm×5cm breakpoint for that price.  I could get 3 copies from OSHPark for $6.88 (including shipping).  If I later need a larger number of boards, I can get 100  boards smaller than 5cm×5cm for $75 or 200 for $120 from ITEAD, but I don’t think I’ll need that many this year, since we’ll either make a dozen pressure sensors for the lab, or have each student solder up their own (for which 30 boards would be plenty this year).

I also found a source for a cheap capacitor collection that we may be able to use for the student kits.  It has 10 each of 25 different values from 1pF to 0.1µF.  I would have preferred slightly larger values (say, 47pF to 4.7µF), but at $4.80 for 250 capacitors it seems like a pretty good deal.  Unfortunately, I can’t tell if they are 0.1″ or 0.2″ spacing on the leads, which would make a difference for my protoboard design.  If I order the pressure sensor breakout boards from ITEAD, I could order capacitors at the same time.


Next Page »